Last Updated on April 15, 2024 by Ryan
Hairline cracks and fissures smaller than 1.5 mm wide or the width of a penny are quite prevalent in concrete, stone, brick, and masonry block foundation walls and cement floors, and normally do not justify any remedial effort.
The majority of these little tight fractures are produced by natural structural settling, which happens within the first few years after construction. Cement paint, caulk, or mortar should be used to cover cracks bigger than 1.5 mm to prevent water from coming in and to aid in monitoring.
Flexible caulk stretches and will not reveal continuous movement, so it should not be used to seal crevices that you wish to monitor.
Learn How To Monitor Foundation Cracks!
Masonry Crack Fillers:
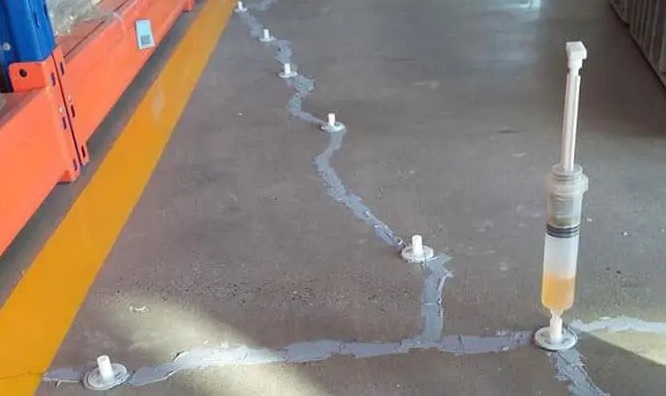
If a horizontal, vertical, or diagonal masonry crack is filled using a hard masonry patching compound, any significant future movement will almost certainly manifest itself as a new crack in the patched region (or nearby).
Keep in mind that some masonry materials shrink as they dry and cure; don’t confuse a patch shrinkage crack with structural movement. Grout that does not shrink is an excellent option. If a foundation fracture is leaking water, you should seal it rather than merely keep an eye on it.
“All” cracks, even hairline cracks should be monitored for continued movement.
If a crack has been sealed or filled in with paint, caulk, or mortar and you discover it has re-cracked, or the crack has opened up or grown wider (and it isn’t due to shrinking of the filler product), there is movement and should be considered, even if it is little.
When foundation cracks continue to shift, they should be investigated since they may need to be repaired. After sealing large cracks with a diameter of 6.5 mm or 1/4 inch or more, keep an eye on them to make sure they don’t move again.
Measure and Document Foundation Movement:
The presence of masonry foundation fractures may not be the sole or even the most important sign of foundation movement. If a foundation wall is leaning, bending, or bowing, the tension may have resulted in a number of tiny width cracks that may not accurately represent the entire amount of foundation movement.

Examination of Foundation Cracks
- Examine the nature and severity of the crack
- What direction are the cracks going and where are they the widest?
- Note sloped floors, bulging walls and doors that do not fit.
- Determine the probable cause
- Foundation erosion.
- Decay and/or improper use of materials.
- Structural failure.
- Change in materials or geometry.
- Changes in moisture content.
- Thermal changes
- Horizontal or diagonal cracks near the ground at piers in long walls: due to horizontal
shearing stresses between the upper wall and the wall where it enters the ground - Vertical cracks near the ends of walls,
- Vertical cracks near the top and ends of the facade,
- Cracks around stone sills or lintels: due to expansion of the masonry against both ends of the tight-fitting stone piece that cannot be compressed.
How to Monitor Foundation Cracks – Three Simple Methods
A. Simple Method of Monitoring Cracks Using Tape and Pencil:
- Tape either side of the crack with a high-quality adhesive piece of tape.
- Draw one short line parallel to the crack on each piece of tape at a suitable distance (2 inches). Measure as precisely as possible using a ruler, or use anything as a pattern for several markings.
- The distance between the lines on the tape will fluctuate as the crack moves; if the gap is extensive, numerous monitors will be required.
- At weekly intervals, make a chart depicting the distance between the tape’s markers.
- Keep detailed notes of these measures, as well as images, in a file.
- If substantial expansion happens, notify a structural engineer with backup data and copies of images for advice.
B. Monitoring Cracks Using Glass and Epoxy:
- To bridge the crack, use a tiny piece of single-strength window glass (a microscope slide works well). This may also be done using tiny glass rods.
- On either side of the fracture, epoxy the ends of the glass to the brickwork; position it in an inconspicuous location.
- If the glass breaks, that means the walls are still shifting and the crack is getting worse.
C. Monitoring Cracks Using the Avongard Crack Monitor:
The Avongard Crack Monitor is a straightforward tool for determining the migration of cracks in brick, concrete, or masonry buildings. Two overlapping acrylic plates make up the Avongard Crack Monitor. The white plate has a black millimeter grid, whereas the transparent plate has red crosshairs centered over the grid. If movement happens while the Crack Monitor is in place across a crack, the cross-hairs on the grid shift vertically or horizontally, allowing anybody to readily view and follow crack movement.

- Place the monitor above the crack, with the scale’s vertical “0” line parallel to the crack to be measured.
- Screws or glue can be used to secure the display.
- With a sharp knife, cut the clear tape keeping the two plates of the scale on the monitor in a fixed position; when the two plates slide independently of one another, the degree of movement on each side of the crack will be monitored over time.
Each Avongard Monitor comes with a Crack Progress Chart that provides an accurate record of crack movement. Simply check the gauge at regular intervals and replicate the cross hairs’ location onto one of the chart’s grids. An engineer can determine what corrective activity is required after establishing a pattern of movement on the Progress Chart.